Yellow is the trickiest colour to wear on your hands and the most rewarding when it works. It sits right next to your skin tone, so it either makes your hands look warm and bright or slightly washed out and sallow, and there is not much middle ground.
I found that out the hard way.
My first set was a cool neon yellow that looked incredible on the swatch stick and did nothing good for my hands at all. The second set, a soft butter yellow, is still one of my favourite manicures. Same idea, three shades apart. Here is how to land on the right one, plus twelve versions worth booking.
Picking a yellow that flatters your hands
Yellows split into warm and cool. Warm yellows lean toward butter, honey, and mustard, with a hint of orange or brown in them. Cool yellows lean toward lemon, neon, and acid, with a green or white edge. Warm yellows generally flatter deeper and olive skin tones beautifully, and cool bright yellows tend to pop most against deep skin. Very pale cool tones can wash out fair hands, which is exactly what happened to me.
The quick test is to hold the bottle against the inside of your wrist in daylight, not under salon lighting. If your hand looks brighter, that is your yellow. If it looks tired, it is not. And here is the thing I noticed after a few sets, yellow is far more forgiving as a tip than as a full nail, which is precisely why the french version of this trend spread so much faster than solid yellow ever did.
1. Classic butter yellow tip
The safest and prettiest entry point. A soft warm butter yellow tip over a sheer nude or milky base, clean line, glossy finish. It reads as a neutral from a distance and as a colour up close, which is why it works for work, weddings, and everything in between.
2. Neon yellow on a clear base
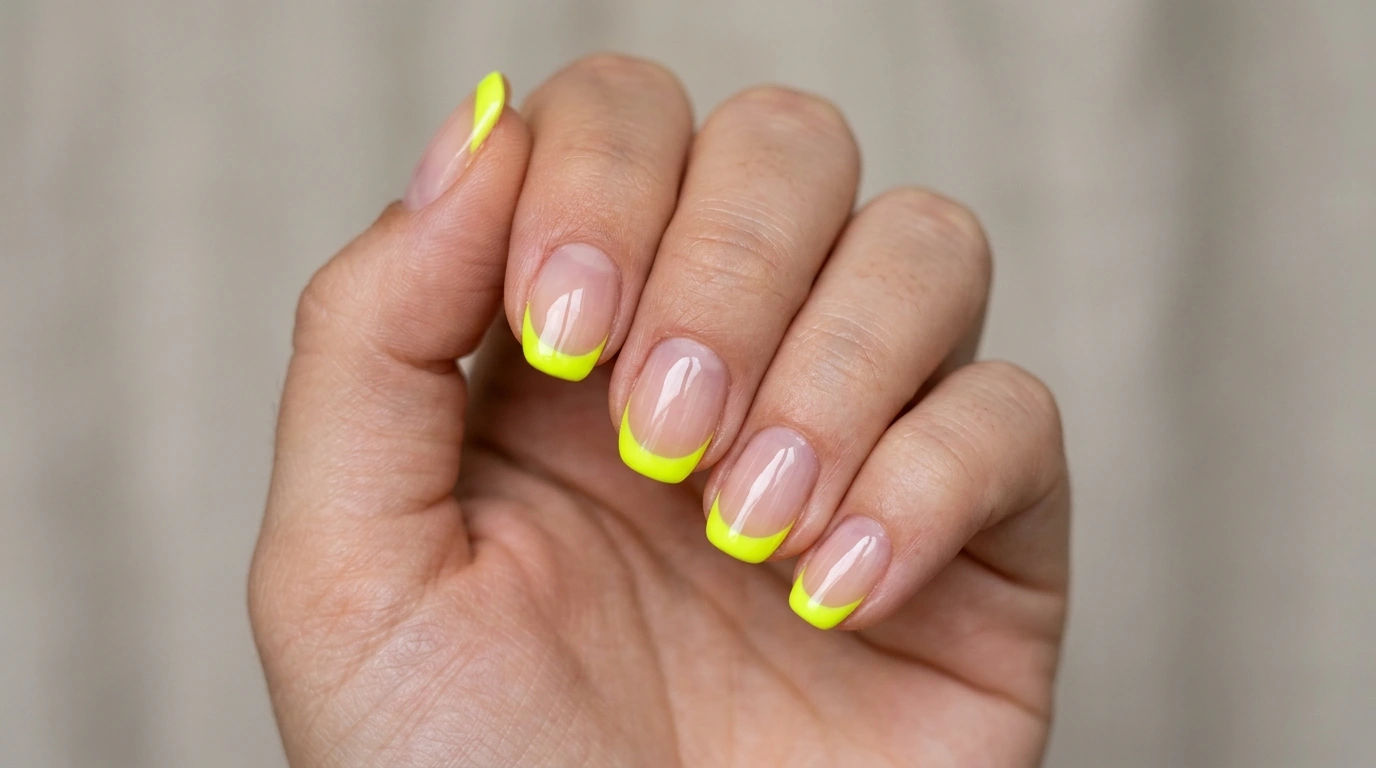
Full brightness, nothing else competing. A clear or barely there base with a neon yellow tip is loud in the best way and it looks especially striking against tanned or deep skin. Neons often need three thin coats to reach true opacity, so expect a slightly longer appointment.
3. Micro thin yellow line
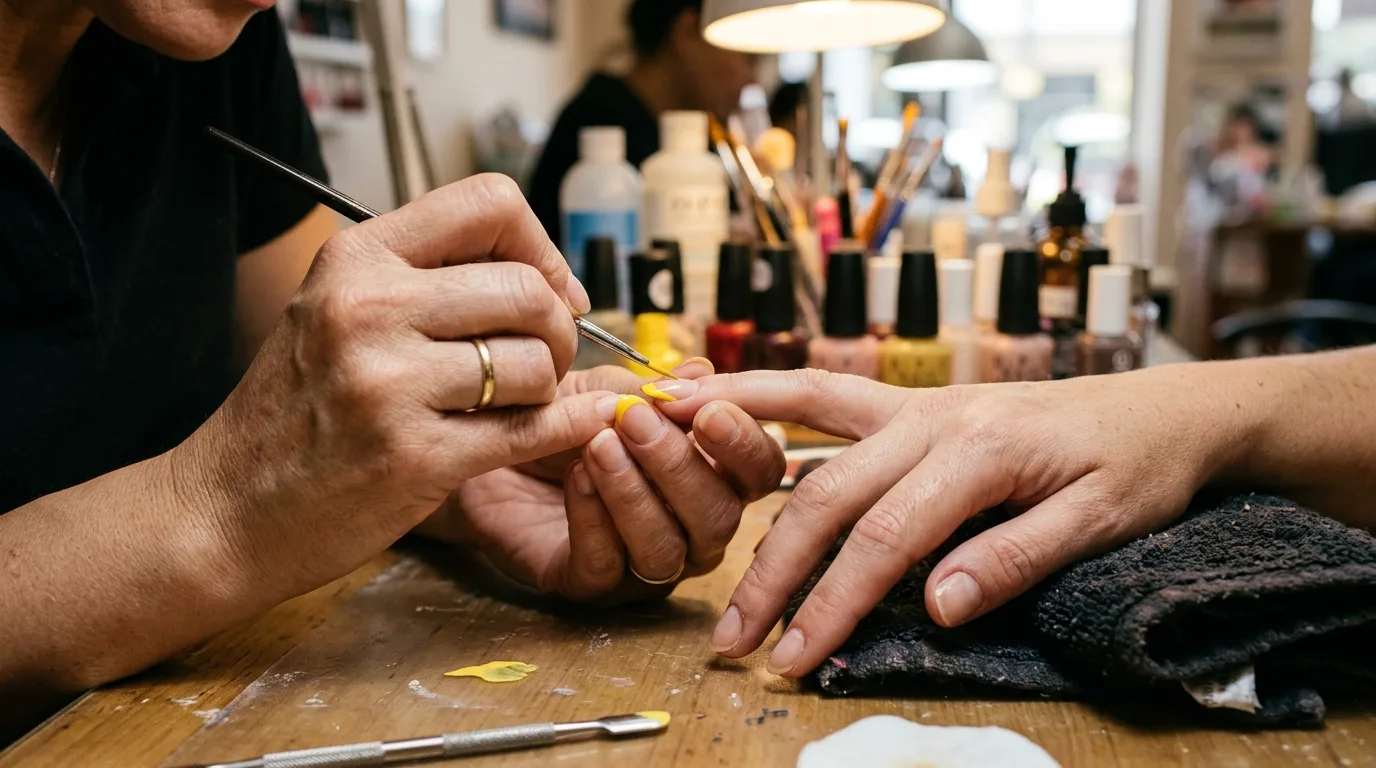
A hairline tip, roughly one millimetre. On short nails a thick tip eats your length, and a thin yellow line gives you the colour without shortening the nail visually. This is my default recommendation for anyone with nails under half an inch.
4. Double french with white and yellow
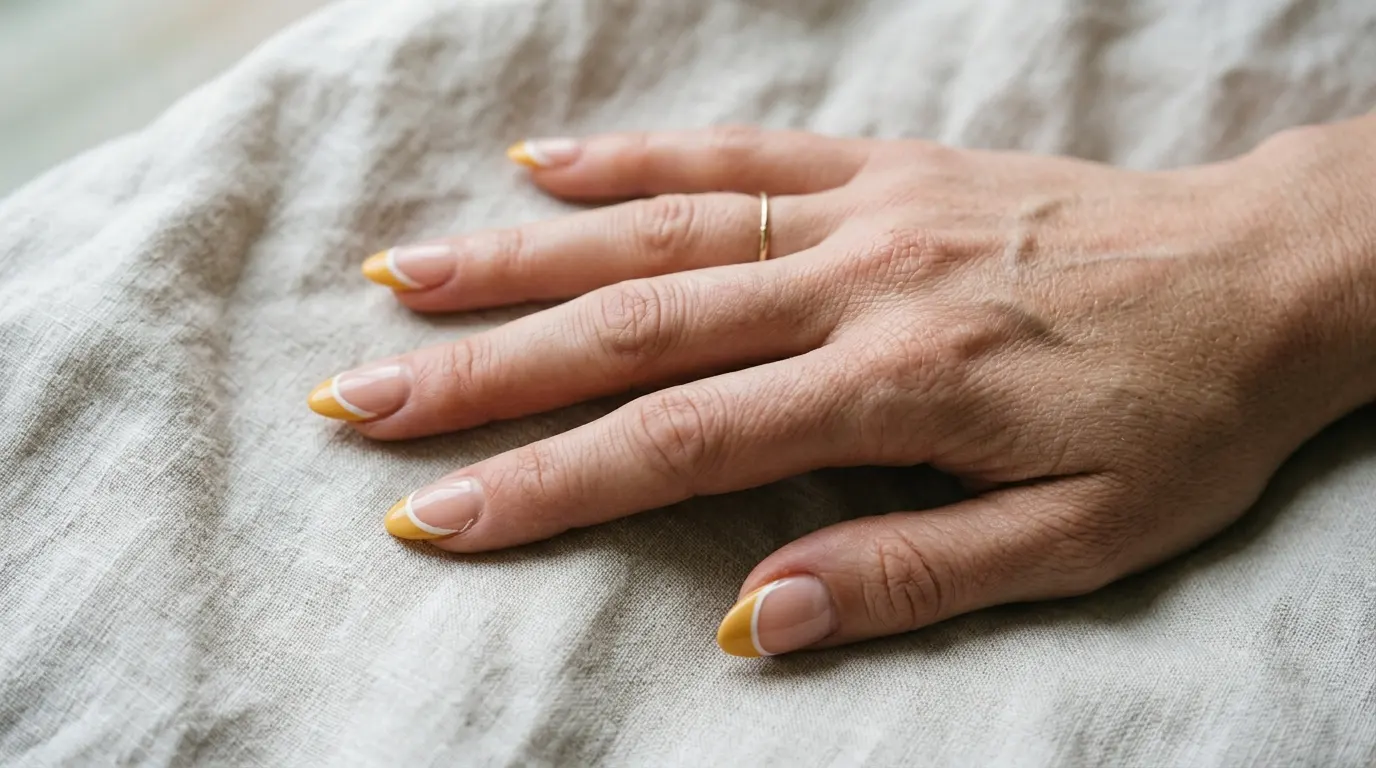
Two parallel lines, a thin white one just below a yellow tip, or the reverse. It looks considerably more complicated than it is and it costs maybe ten minutes extra. Keep both lines thin, since two thick bands stacked at the tip looks heavy fast.
5. Diagonal or slanted tips
The tip line runs at an angle rather than following the nail edge. It suits almond and coffin shapes particularly well because the diagonal echoes the taper. Ask for the same angle on every nail, since inconsistent angles across ten fingers looks accidental rather than designed.
6. Yellow tip with a gold micro line
A thin metallic gold line drawn along the boundary between the base and the yellow tip. The gold hides any wobble in the line, which is the trick every tech uses on french sets. It also warms the yellow up, which helps if your shade came out cooler than you wanted.
7. Chrome yellow tips
Yellow under a fine chrome or pearl powder for a shifting metallic finish. This needs a no wipe gel top coat underneath and another sealing layer over it, otherwise the powder dulls within days. Chrome makes even a pale yellow read as intentional rather than washed out.
8. Yellow and white checkerboard tips
A small checker pattern confined to the tip area only. Busy patterns across the whole nail overwhelm on shorter lengths, but contained in the tip it looks graphic and controlled. Two or three nails per hand, solid tips on the rest.
9. Yellow tips with tiny daisies
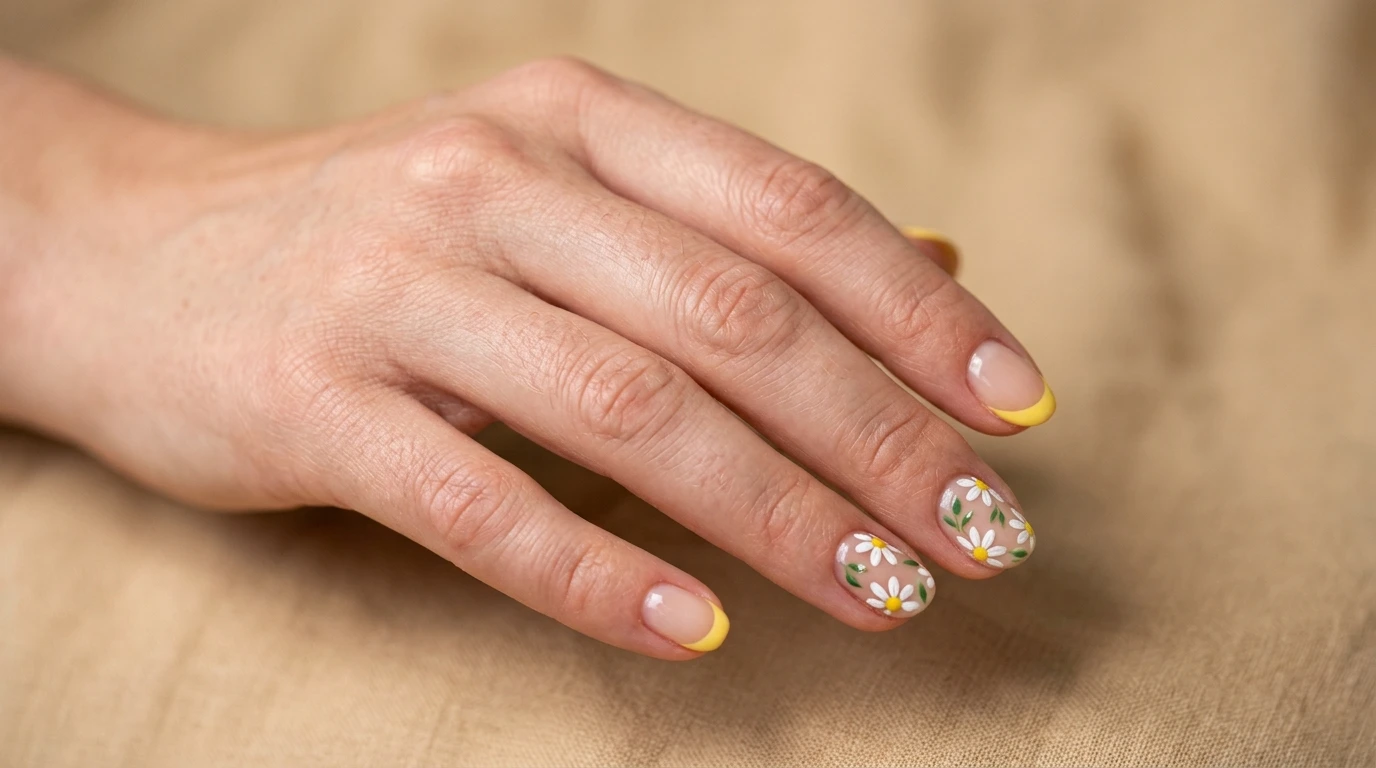
A white flower with a yellow centre on one or two accent nails, plain yellow tips on the others. It is the most requested spring version and it is genuinely charming rather than childish if the flowers stay small, around a third of the nail width. Hand painted with a dotting tool, not a sticker.
10. Ombré fade into the tip
The yellow blends softly from nothing into full colour at the tip rather than stopping at a hard line. It is forgiving on nails that are growing out, since there is no crisp boundary to shift away from the fingertip. Airbrush or sponge, not a brush.
11. Yellow tip with a black outline
A fine black line tracing the top edge of the yellow tip. It is a small change and it makes the whole set look graphic and deliberate, closer to a design than a french. Works best on longer square or coffin shapes where the line has room.
12. Mustard tips for autumn
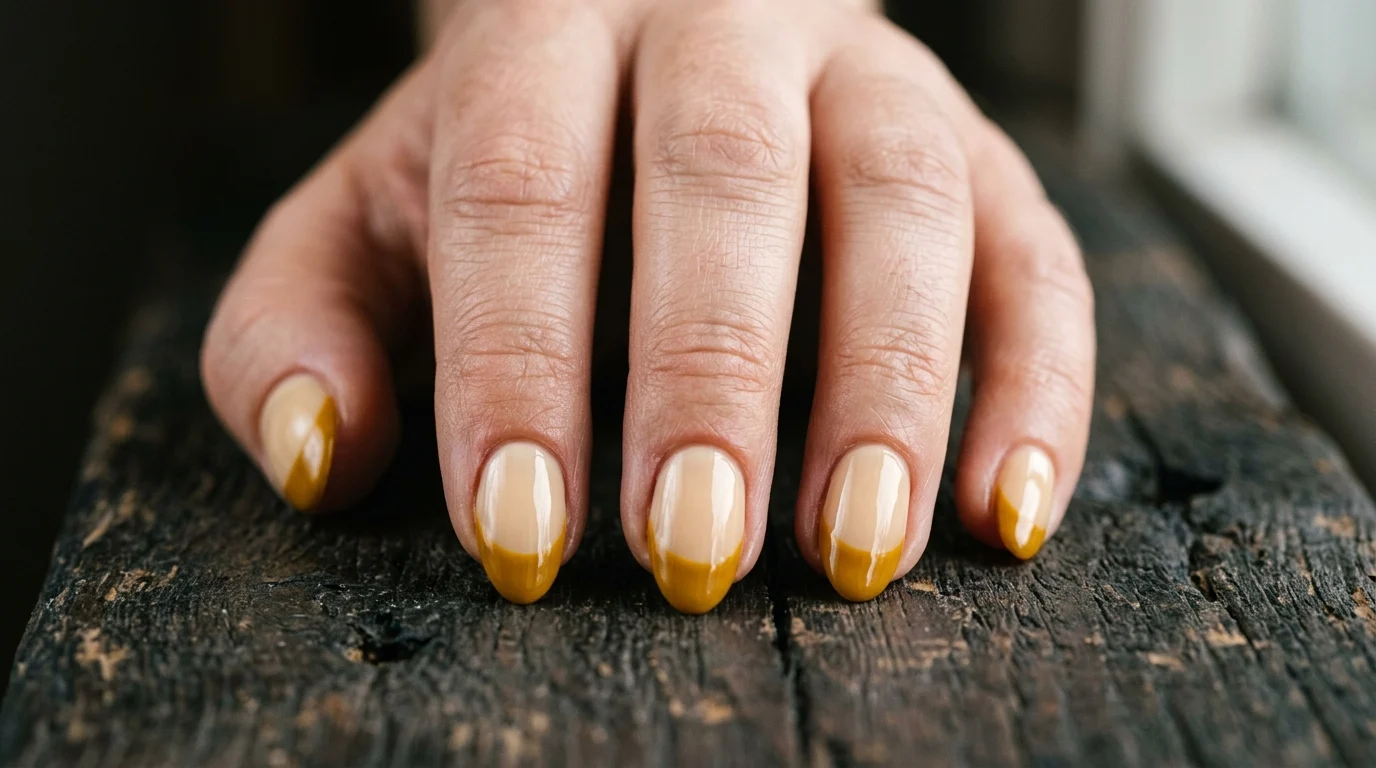
A deeper, browner yellow that carries into cooler months when a bright lemon feels out of place. Mustard flatters warm and deep skin tones especially well and it pairs beautifully with brown or cream bases. This is the version I would book in October.
Getting a clean line and making it last
The line is what separates a good french from a mediocre one, so it is worth knowing how it is done. Most techs use a fine liner brush and paint the smile line in two strokes from each sidewall meeting in the middle, rather than one sweep across, because two strokes give you control over the symmetry. French tip guide stickers exist but they often lift the base coat, so a skilled hand beats them. If you are doing this yourself, thin the polish, use a brush rather than the bottle applicator, and clean up any overflow with a small brush dipped in acetone before curing rather than trying to paint perfectly first time. On thickness, match the tip to your nail length. Under half an inch of nail wants a one to two millimetre tip, medium length can carry three, and anything longer can go thicker if you want a bolder look. On product, gel lasts two to three weeks and holds the crisp line far better than regular polish, which chips at the tip first, and the tip is exactly where the eye goes on a french. If you want this at home with regular polish, expect the line to soften within a few days and plan to touch up. And one honest note, yellow pigments are among the harder ones to build to full opacity, so a cheap yellow polish will look streaky no matter how carefully you apply it. This is a colour worth spending a little more on.
Frequently asked questions
What shade of yellow suits my skin tone? Warm butter, honey, and mustard yellows tend to flatter olive and deeper skin tones, while bright cool yellows pop most against deep skin. Hold the bottle against the inside of your wrist in daylight and check whether your hand looks brighter or tired.
Do yellow french tips work on short nails? Yes, as long as the tip stays thin. Keep it to one or two millimetres on nails under half an inch, since a thick tip visually shortens the nail and undoes the elongating effect a french usually gives.
Are yellow french tips only for summer? Bright lemon and neon read as summer, but butter yellow works year round and mustard suits autumn and winter well. The shade decides the season far more than the colour itself does.
How do I get a clean french tip line at home? Use a fine liner brush rather than the bottle applicator, paint from each sidewall inward so the two strokes meet in the middle, and clean up any overflow with a small brush dipped in acetone before it sets.
How long do yellow french tips last? Gel typically holds two to three weeks with a crisp line, while regular polish starts softening at the tip within a few days. The tip is the first place any french manicure chips, so gel is worth it for this design.
Final thoughts
Yellow gets written off as a difficult colour and it mostly is not. It is just unforgiving about shade, and once you find the one that suits your hands it becomes something you keep going back to rather than a one off summer experiment.
So do the wrist test before you commit to anything, and start with butter yellow if you are unsure, because it is the version almost nobody looks bad in. Come back and tell me which shade you landed on, since I am still convinced butter is the right answer and I am open to being argued with.