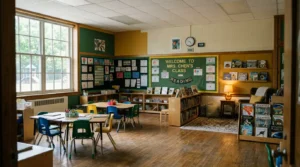
My first playroom was gorgeous. Cream walls, a big neutral rug, fourteen matching woven baskets with little chalkboard labels, and a shelf of wooden toys arranged like a shop display.
It lasted nine days.
Then it turned into a floor covered in plastic, three empty baskets, and a kid playing in the hallway instead. So I rebuilt it, watched what she actually did, rebuilt it again, and eventually landed on something that works and still looks decent when people come over.
What I got wrong the first two times
I designed for photos instead of for play. That is the honest summary. Every system I set up needed an adult to maintain it, and no four year old is going to sort small bins by category at the end of the day, so the whole thing collapsed within a week and I quietly resented it.
The second thing is that I put the playroom in the finished basement, one floor away from wherever I actually was. Kids under about six do not want to play alone in a distant room, no matter how nice it is. She would carry armfuls of toys upstairs to be near me, and once I understood that, everything got easier.
1. Put the playroom where you already are
Proximity beats square footage almost every time. A corner of the living room, a dining room you never use formally, or the room right off the kitchen will get used ten times more than a perfect basement setup. If the basement is your only option, put a comfortable chair down there for yourself, because you will be spending the afternoons in it whether you planned to or not.
2. Keep every bit of storage low and open
The rule I use now is that a child should be able to see and reach everything without asking. Open shelving no taller than thirty six inches, bins without lids, and nothing stacked. Lidded boxes on a high shelf might as well not exist, since anything a kid cannot independently get out is also something they never independently put away.
3. Run a toy rotation with four bins
This is the single change that transformed our room. Most of the toys live in four large lidded bins in a closet, and only about a quarter of them are out at a time. Swap one bin every two or three weeks. The toys come back feeling brand new, the floor stays manageable, and I noticed she plays with each thing far longer when there is less competing for her attention.
4. Set up zones instead of one open room
Kids play in modes, so give each mode a corner. Something to build in, something soft to read in, a surface to make a mess on, and an open patch of floor for the big physical stuff. You do not need dividers, just furniture placement. A bookshelf turned perpendicular to the wall makes a reading nook out of nothing.
5. Choose a floor you will not stress about
Washable rug or interlocking foam under the play area, and if you can, keep the art corner over a hard floor. My favorite version is a large low pile washable rug that goes in the machine, because glitter, glue, and one memorable incident with a smoothie all came out. Sound matters too, since a hard empty room with kids in it is genuinely loud.
6. Label with pictures, not words
If your kid cannot read yet, a chalkboard label saying Blocks is decor for you, not information for them. Tape a photo of the actual contents on the front of each bin. Kids as young as two will match a picture to an object, and clean up stops being a thing you fully supervise.
7. Build an art station with a wipeable wall behind it
A small table at their height, a cup of markers, paper on a roll, and either a wipeable paint finish or a big sheet of acrylic mounted behind it. Put a plastic tray under everything to catch spills. And keep the messy supplies like paint and glue in a spot only you can reach, unless you enjoy surprises.
8. Store books face out on low ledges
Spine out storage is for adults who already know what they want. Kids choose books by cover, so a couple of narrow picture ledges at their eye level will get pulled from constantly. Six to ten books out at a time, rotated with the toy bins, works better than a full shelf they ignore.
9. Add one thing to climb or swing on
Indoor movement is the thing most playrooms forget, and it matters more on rainy days than any toy. A small climbing triangle, a doorway bar, or a ceiling hook rated for a swing if your joists allow it. Get the ceiling mount installed properly into a joist by someone who knows what they are doing, please, and put the crash mat underneath.
10. Pick a palette you can live with
Primary red, yellow, and blue everywhere is not a rule anybody has to follow. Neutral walls, warm wood, and one or two real colors in the textiles gives you a calm room, and the toys bring all the brightness you need. This is not about making it look grown up, it is about the room feeling calm when it is full of stuff.
11. Skip themed and character furniture
That race car bed and the character wall decal will be embarrassing to your child in about twenty months, and I have watched it happen twice. Buy plain furniture that can move into a bedroom or a study later, then let the theme live in the removable stuff. Bedding, posters, and cheap wall decals are easy to swap when the obsession changes.
12. Do the safety pass before anything else
Anchor every shelf and bookcase to the wall with the included brackets, no exceptions. Cordless blinds only, outlet covers in, no unsecured heavy items above kid height, and check the rug for a non slip pad underneath. It takes about an hour and it is the only part of this list that genuinely cannot wait.
How to put it together without buying everything new
Start by watching your kid for a week before you buy a single thing. Where do they actually play? What do they reach for every day and what has not moved in a month? Then set up around that, because a room built on real habits works and a room built on an aspiration usually does not. Buy secondhand for the big items, since kids furniture on local marketplaces is plentiful and cheap for the obvious reason that everyone outgrows it. Spend your money on the rug and the shelving, which are the two things that take daily abuse, and go cheap or free on the rest. Then build in a reset routine that takes five minutes, not thirty. Ours is one song long, everything goes in whichever bin it belongs to, and I do not care if the puzzle pieces end up with the cars. Perfect sorting is an adult value, and the goal is a floor you can walk across at seven pm, not a system that photographs well.
Frequently asked questions
How do I organize a playroom so it stays tidy? Use low open bins with picture labels, keep only a quarter of the toys out at a time, and do a short daily reset with your child rather than a big weekly overhaul. Fewer toys visible means less to clean up and more focused play.
What should every playroom have? A soft washable floor surface, low open storage, a spot to be creative, a comfortable reading corner, and something safe for physical play. Anything beyond that is a bonus rather than a requirement.
How do I make a small playroom work? Go vertical with wall shelving and picture ledges, keep the center of the floor clear, and rotate toys aggressively so the space is never overloaded. Furniture that doubles as storage, like a bench with bins underneath, helps a lot in a tight room.
What colors are best for a playroom? Neutral or soft muted walls with color coming from rugs, art, and the toys themselves. Very saturated walls can make a busy room feel busier, though a single painted accent wall in a color your child chose works nicely.
At what age does a child stop using a playroom? Most kids shift away from a dedicated playroom somewhere between eight and ten, when friends and screens and homework take over. Choosing plain furniture from the start makes converting the space into a study or hangout room much easier.
Final thoughts
The best playroom I have ever seen belonged to a friend of mine, and it was honestly kind of plain. Wood shelves, a big washable rug, four bins, a swing in the corner, and a beat up armchair where she sat with her coffee while the kids built things. It looked lived in rather than styled, and every child who visited stayed in there for hours.
So build for that instead of for the photo. Watch what your kid loves, put it where they can reach it, and let the room get a little messy. If you try the four bin rotation, come back and tell me how the first swap went, because that first week is usually the moment it clicks.